
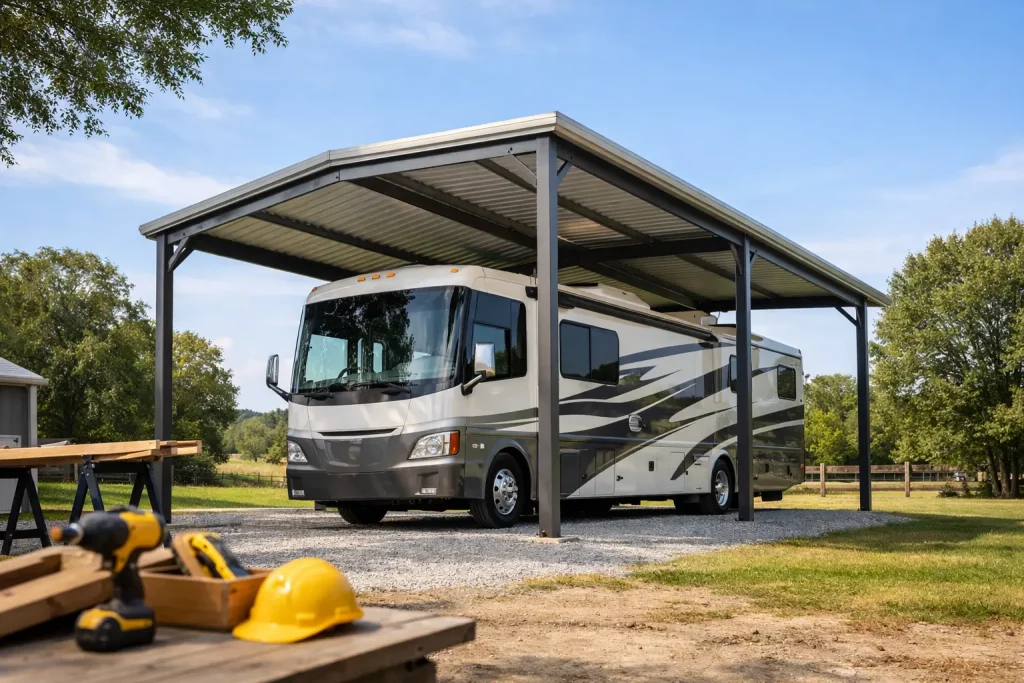
An RV that sits out in the open pays for it every season. Sun breaks down seals and finishes. Heavy rain finds weak spots. Wind-driven debris and falling limbs can turn a small problem into an expensive repair. That is why homeowners and property owners keep asking how to build a RV carport that actually protects a large vehicle instead of just covering part of it.
The short answer is this: size it correctly, engineer it for your local conditions, and build with materials that can handle years of weather without constant upkeep. For most buyers, that points to steel. A wood structure can work, but once span width, height, and maintenance enter the conversation, steel usually gives you a cleaner path to long-term value.
How to build a RV carport the right way
Before you think about panels, trim, or color, start with the RV itself. Too many carports are built around a rough guess, then end up too narrow to open doors comfortably or too short for a rooftop AC unit. Measure the full length, full width with mirrors and slide-out clearance in mind, and total height from grade to the tallest rooftop component.
Then add practical working room. A carport that technically fits your RV can still be frustrating to use. You want enough width to back in without threading a needle and enough length to protect the front cap, rear ladder, and any accessories. Height matters even more. If your RV is close to the roofline, you limit ventilation and create a tighter margin for uneven ground or future vehicle changes.
For many Class A motorhomes and fifth wheels, a vertical roof steel carport with generous side clearance is the safer choice than trying to build to the bare minimum. It costs more up front than a tight-fit structure, but it tends to perform better and feel easier to live with.
Start with the site, not the structure
A good RV carport begins with a workable site. If the ground stays wet, slopes badly, or forces a difficult approach angle, the building will never perform as well as it should. The best location gives you clean access, enough turning radius, and solid drainage away from the posts or anchors.
Grade the area first. Water should move away from the structure rather than pool under the RV. In many cases, compacted gravel is enough for a basic cover, especially on rural properties, but a concrete pad gives you the best base for clean parking, predictable anchoring, and lower long-term maintenance. If you expect frequent use, want a more finished look, or need a stronger foundation for a larger unit, concrete is usually the better investment.
This is also the stage to check setbacks, easements, and local building requirements. Some counties are straightforward. Others care about height, wind exposure, or where accessory structures can sit on a property. If your site is in a code-sensitive area, engineered plans may be part of the process. That is not red tape for the sake of it. It is what helps make sure the structure is built for real conditions, not just a catalog photo.
Choose the right frame and roof style
If the goal is dependable protection with low upkeep, steel framing stands out. It is strong, efficient across wider spans, and well suited for open-sided or partially enclosed RV covers. It also gives you more flexibility if you want to match nearby buildings or add panels later.
Roof style matters more than some buyers expect. A regular roof is usually the entry-level option, but it is best suited to smaller structures and lighter weather demands. An A-frame roof gives a more traditional look and better runoff. For a taller, longer RV carport, a vertical roof is often the strongest choice because the panels run from ridge to eave, helping rain, leaves, and debris move off the roof more effectively.
That does not mean one style fits every property. If your area sees frequent heavy rain or the occasional snow load, vertical roofing becomes easier to justify. If appearance matters because the carport sits close to your home or shop, an A-frame may be worth the added cost. The right answer depends on your site, your budget, and how much weather exposure your RV sees.
Open sides, partial sides, or fully enclosed?
A standard RV carport is open on the sides, and for many owners that is enough. It keeps the main weather off the roof and body while making parking easy. But open-sided designs do allow driven rain and sun from certain angles.
If you want more protection, consider partial side panels, end panels, or a fully enclosed RV garage-style structure. Side panels can improve shade and reduce weather exposure without making access difficult. A fully enclosed design adds security and the best all-around protection, but it also changes cost, permitting, and ventilation needs. The best choice comes down to what you are protecting against most – sun, storms, debris, or theft.
Build for local wind and weather loads
One of the biggest mistakes in RV cover construction is treating every location the same. A carport built for mild conditions is not automatically suited for open farmland, storm-prone areas, or exposed lots. Wind load, ground conditions, and anchoring all matter.
This is where steel building specialists add real value. A properly specified metal carport should be designed around local requirements, with the right gauge options, bracing, and anchors for the site. On concrete, that may mean one anchor approach. On ground or gravel, it may mean another. Skipping this step to save money up front can cost much more if the structure shifts, loosens, or fails under stress.
For Tennessee buyers and others across the South, weather is not just about rain. Strong storm systems, humidity, and seasonal temperature swings all influence what a long-lasting RV carport should look like. A structure that is engineered and installed with those realities in mind will usually pay off in fewer headaches later.
Plan the dimensions around real use
The best RV carport is not just tall enough and long enough. It is usable day after day. Think about how you enter the site, whether you need room to open storage bays, and if you want space for a second vehicle, a truck, or a utility trailer under the same roof.
Some owners build a single-purpose cover and outgrow it quickly. Others add width for a lean-to effect, creating room for gear, golf carts, or outdoor equipment. If you have the space and the budget, building slightly larger now is often cheaper than replacing a too-small structure later.
Lighting is another practical consideration. If you arrive after dark or use the RV for regular trips, a carport with enough clearance for lighting and easy utility access is worth planning from day one. The same goes for drainage at the drip line and any future side panel additions.
DIY build or professional installation?
If you are asking how to build a RV carport because you want to tackle the project yourself, the honest answer is that it depends on the building size, your equipment, and the level of precision you can bring to the site. A smaller cover on a prepared slab may be manageable for an experienced DIYer with help. A tall RV structure with engineered components, large roof panels, and anchoring requirements is a different level of job.
Professional installation has a cost, but it also reduces risk. That matters when the structure needs to stand straight, anchor correctly, and perform in rough weather. With a larger RV carport, errors in spacing, squaring, panel alignment, or fastening can create performance issues that are hard to fix later.
For many buyers, the best move is not piecing together materials from multiple sources. It is choosing a steel building package that is sized correctly, designed for the site, and installed by crews who do this work regularly. That usually leads to a faster build, a cleaner finish, and fewer surprises.
Don’t overlook customization
An RV carport does not have to be a one-size-fits-all shelter. One of the biggest advantages of modern steel systems is how easily they can be customized. You can adjust width, leg height, roof style, panel layout, and trim color to fit both the RV and the property.
That matters because not every customer needs the same thing. A homeowner protecting a motorhome beside the house may want a cleaner residential appearance. A farm owner may care more about clearance and access for multiple vehicles. A small business may need a larger covered area that works for RV storage now and equipment protection later.
This is where practical planning beats guesswork. A 3D design tool or a real quote conversation can help you see how small changes in height, width, or enclosure affect price and performance before you commit.
What a durable RV carport really comes down to
If you strip away the options and sales language, building a good RV carport comes down to a few fundamentals: proper sizing, solid site prep, weather-appropriate engineering, and durable materials. Steel checks those boxes well because it gives you strength, speed of installation, and low maintenance without asking you to constantly repaint, repair, or reinforce the structure.
Buy for the RV you have, but also for how you use your property. Leave room to maneuver. Build for local weather, not best-case weather. And if you are investing in a large cover, make sure the design is doing more than looking good on paper.
A well-built RV carport should make ownership easier every season, not give you one more project to worry about.